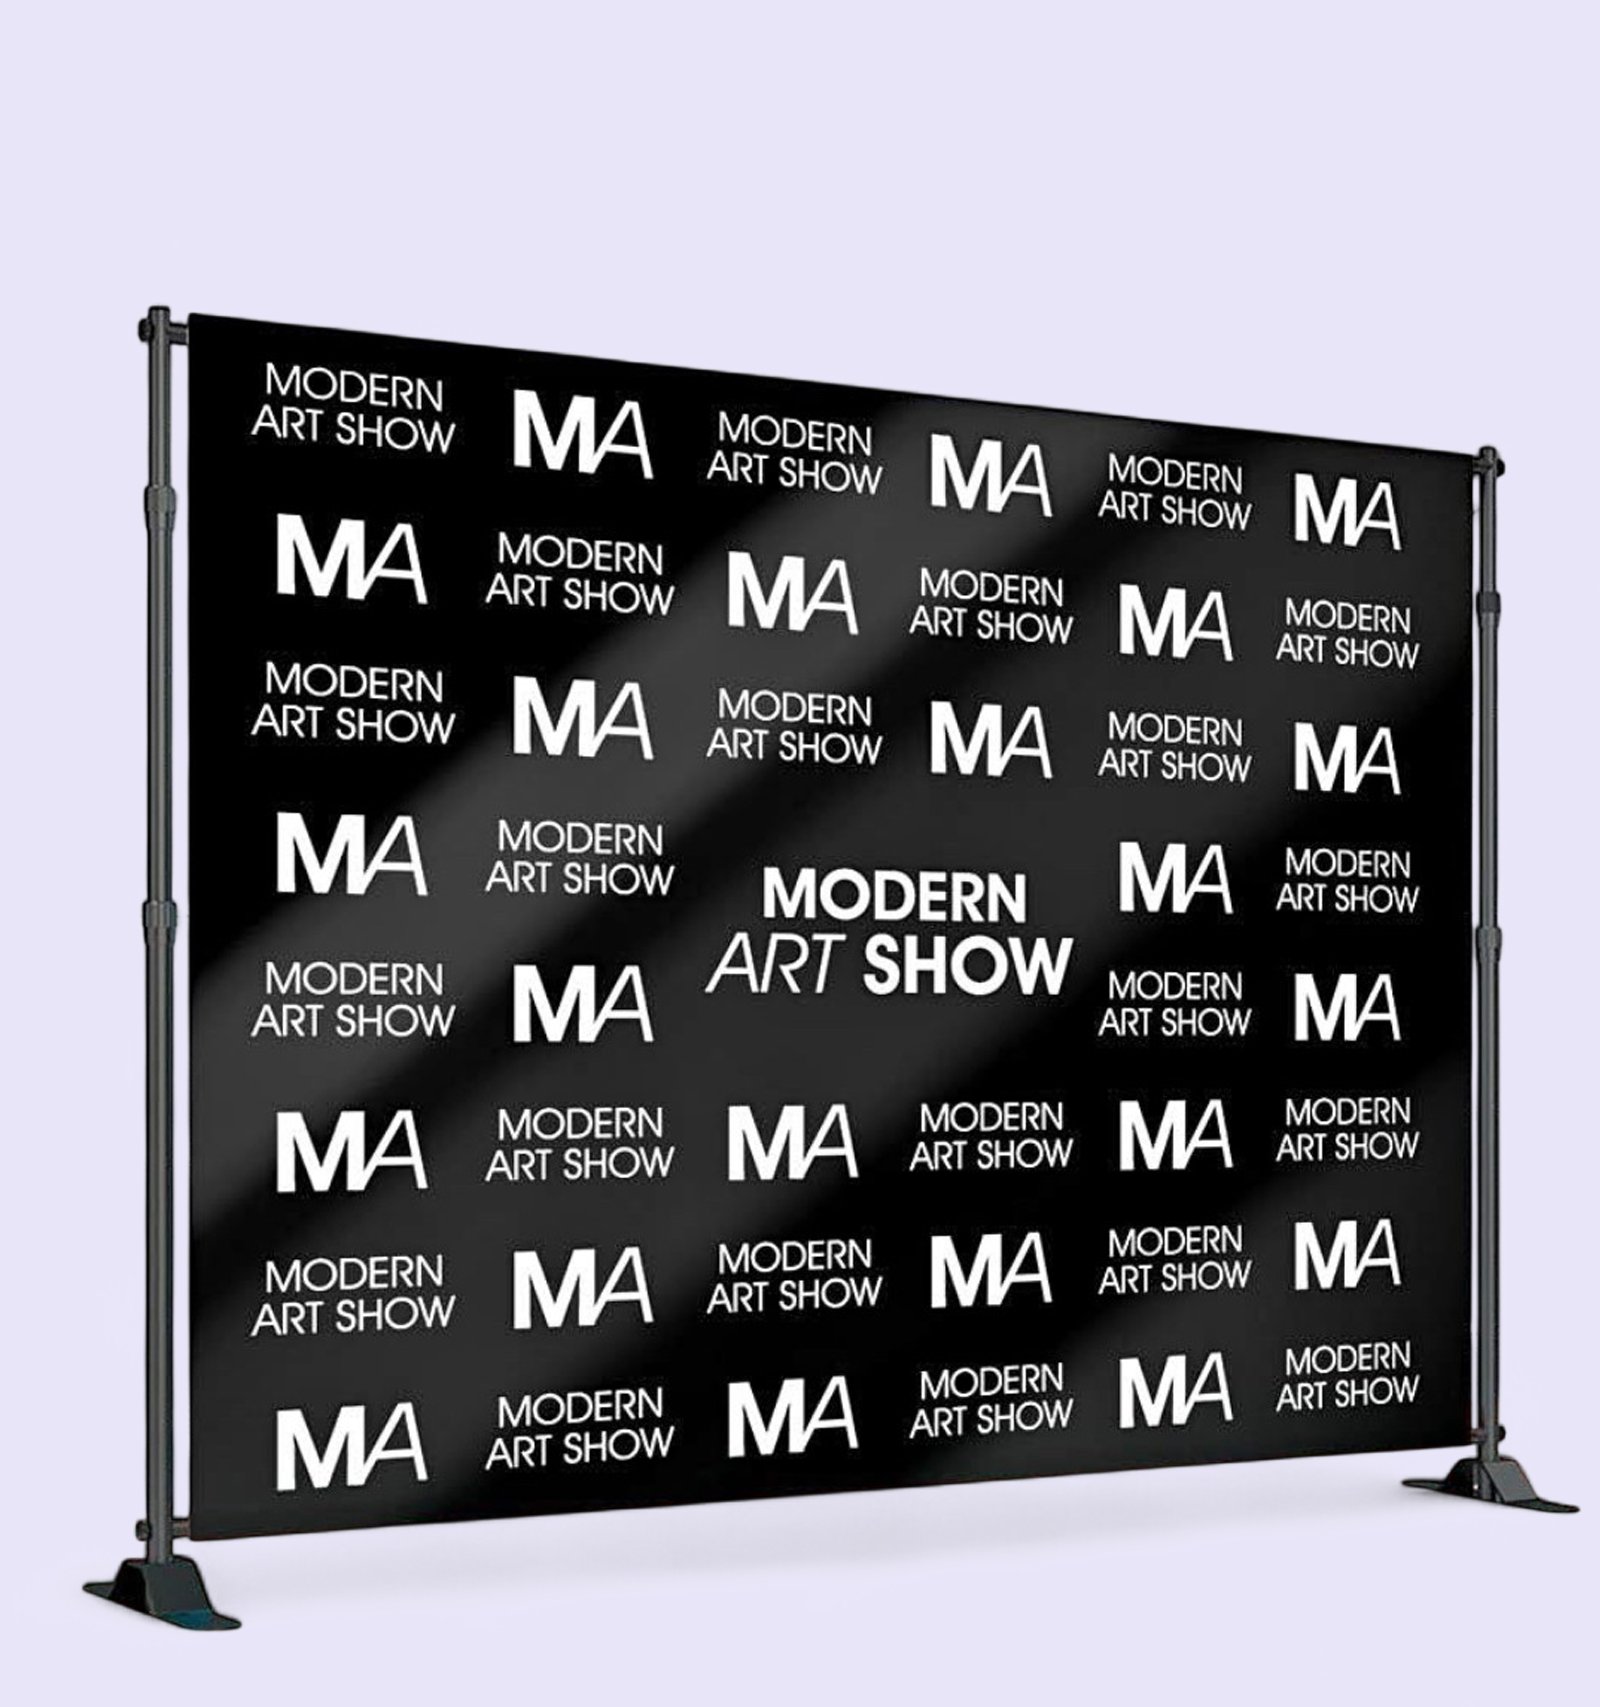
STEP & REPEAT (10'X8')
SELECT PRINT OPTIONS:
Description
Our Large Tube Back Drop stands apart from the competition. While other backdrops on the market are flimsy 1" tubing,our backdrops have telescoping 1.625" diameter poles for market best stability. This display can be adjusted easily to fit a range of graphic sizes on our 9oz wrinkle free dyesub material. Great for events on the go the stand packs up neatly into the free carry bag, and assembles in just a few minutes. It's popular for use as a step and repeat, photo backdrop or tradeshow display.
Spec
Graphic Material:
- Dye Sublimated Wrinkle Free
Print Features:
- Custom sizes - 6' x 4' up to 10' x 8'
- Hemmed edges
- 3" Pole pockets top and bottom
Hardware:
- Superior large tube aluminum hardware (1.625" diameter)
- Plastic locking collars
- Heavy-weight feet for stability
Accessories:
- Complimentary carry bag
File Setup
- Accepted File Formats: JPEG or PDF (single page only)
- Color Space: CMYK
- Resolution: 150dpi for raster images (More than enough for large format)
- Max File Upload Size: 300MB
- Submit artwork built to ordered size - Scaled artwork is automatically detected and fit to order
- Do not include crop marks or bleeds
Additional Tips
- Do not submit with Pantones/Spot Colors - Convert to CMYK
- Convert live fonts to outlines
- Use provided design templates when available
Installation Guide
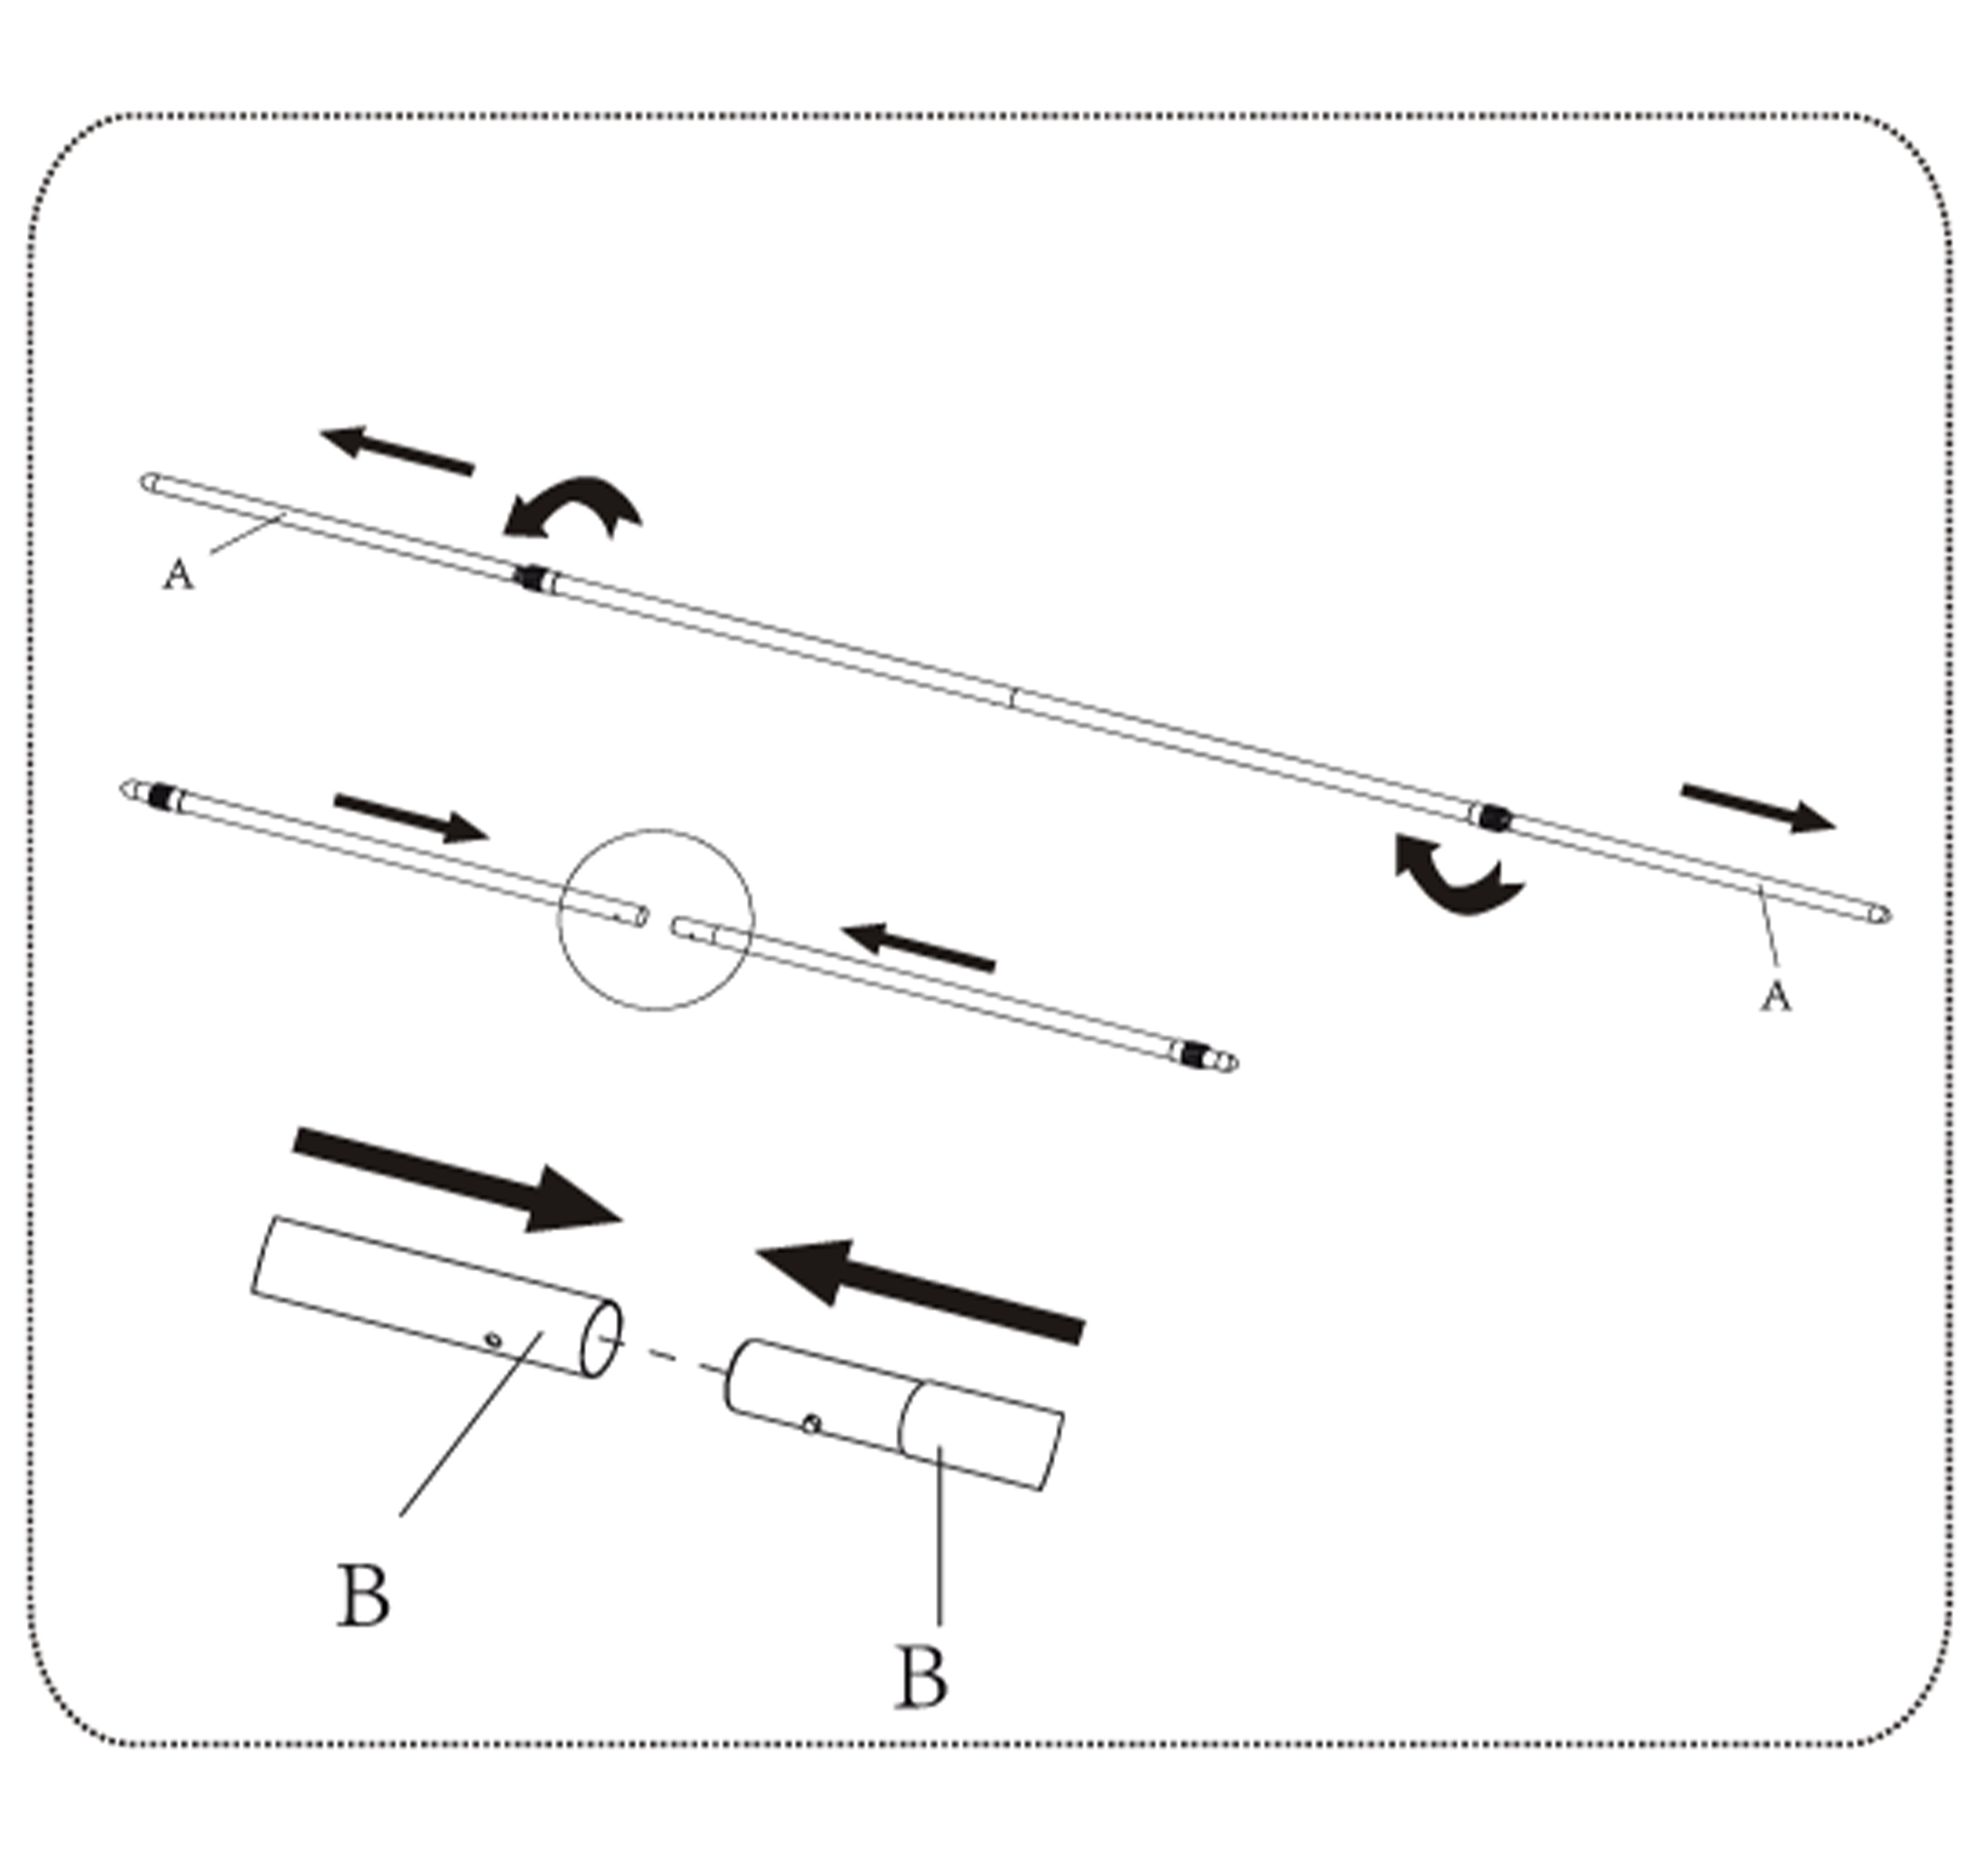
Step 1: Connect the two poles labeled #A-B by joining the B-B ends. Repeat with bottom poles #C-D. Extend telescopic ends A.
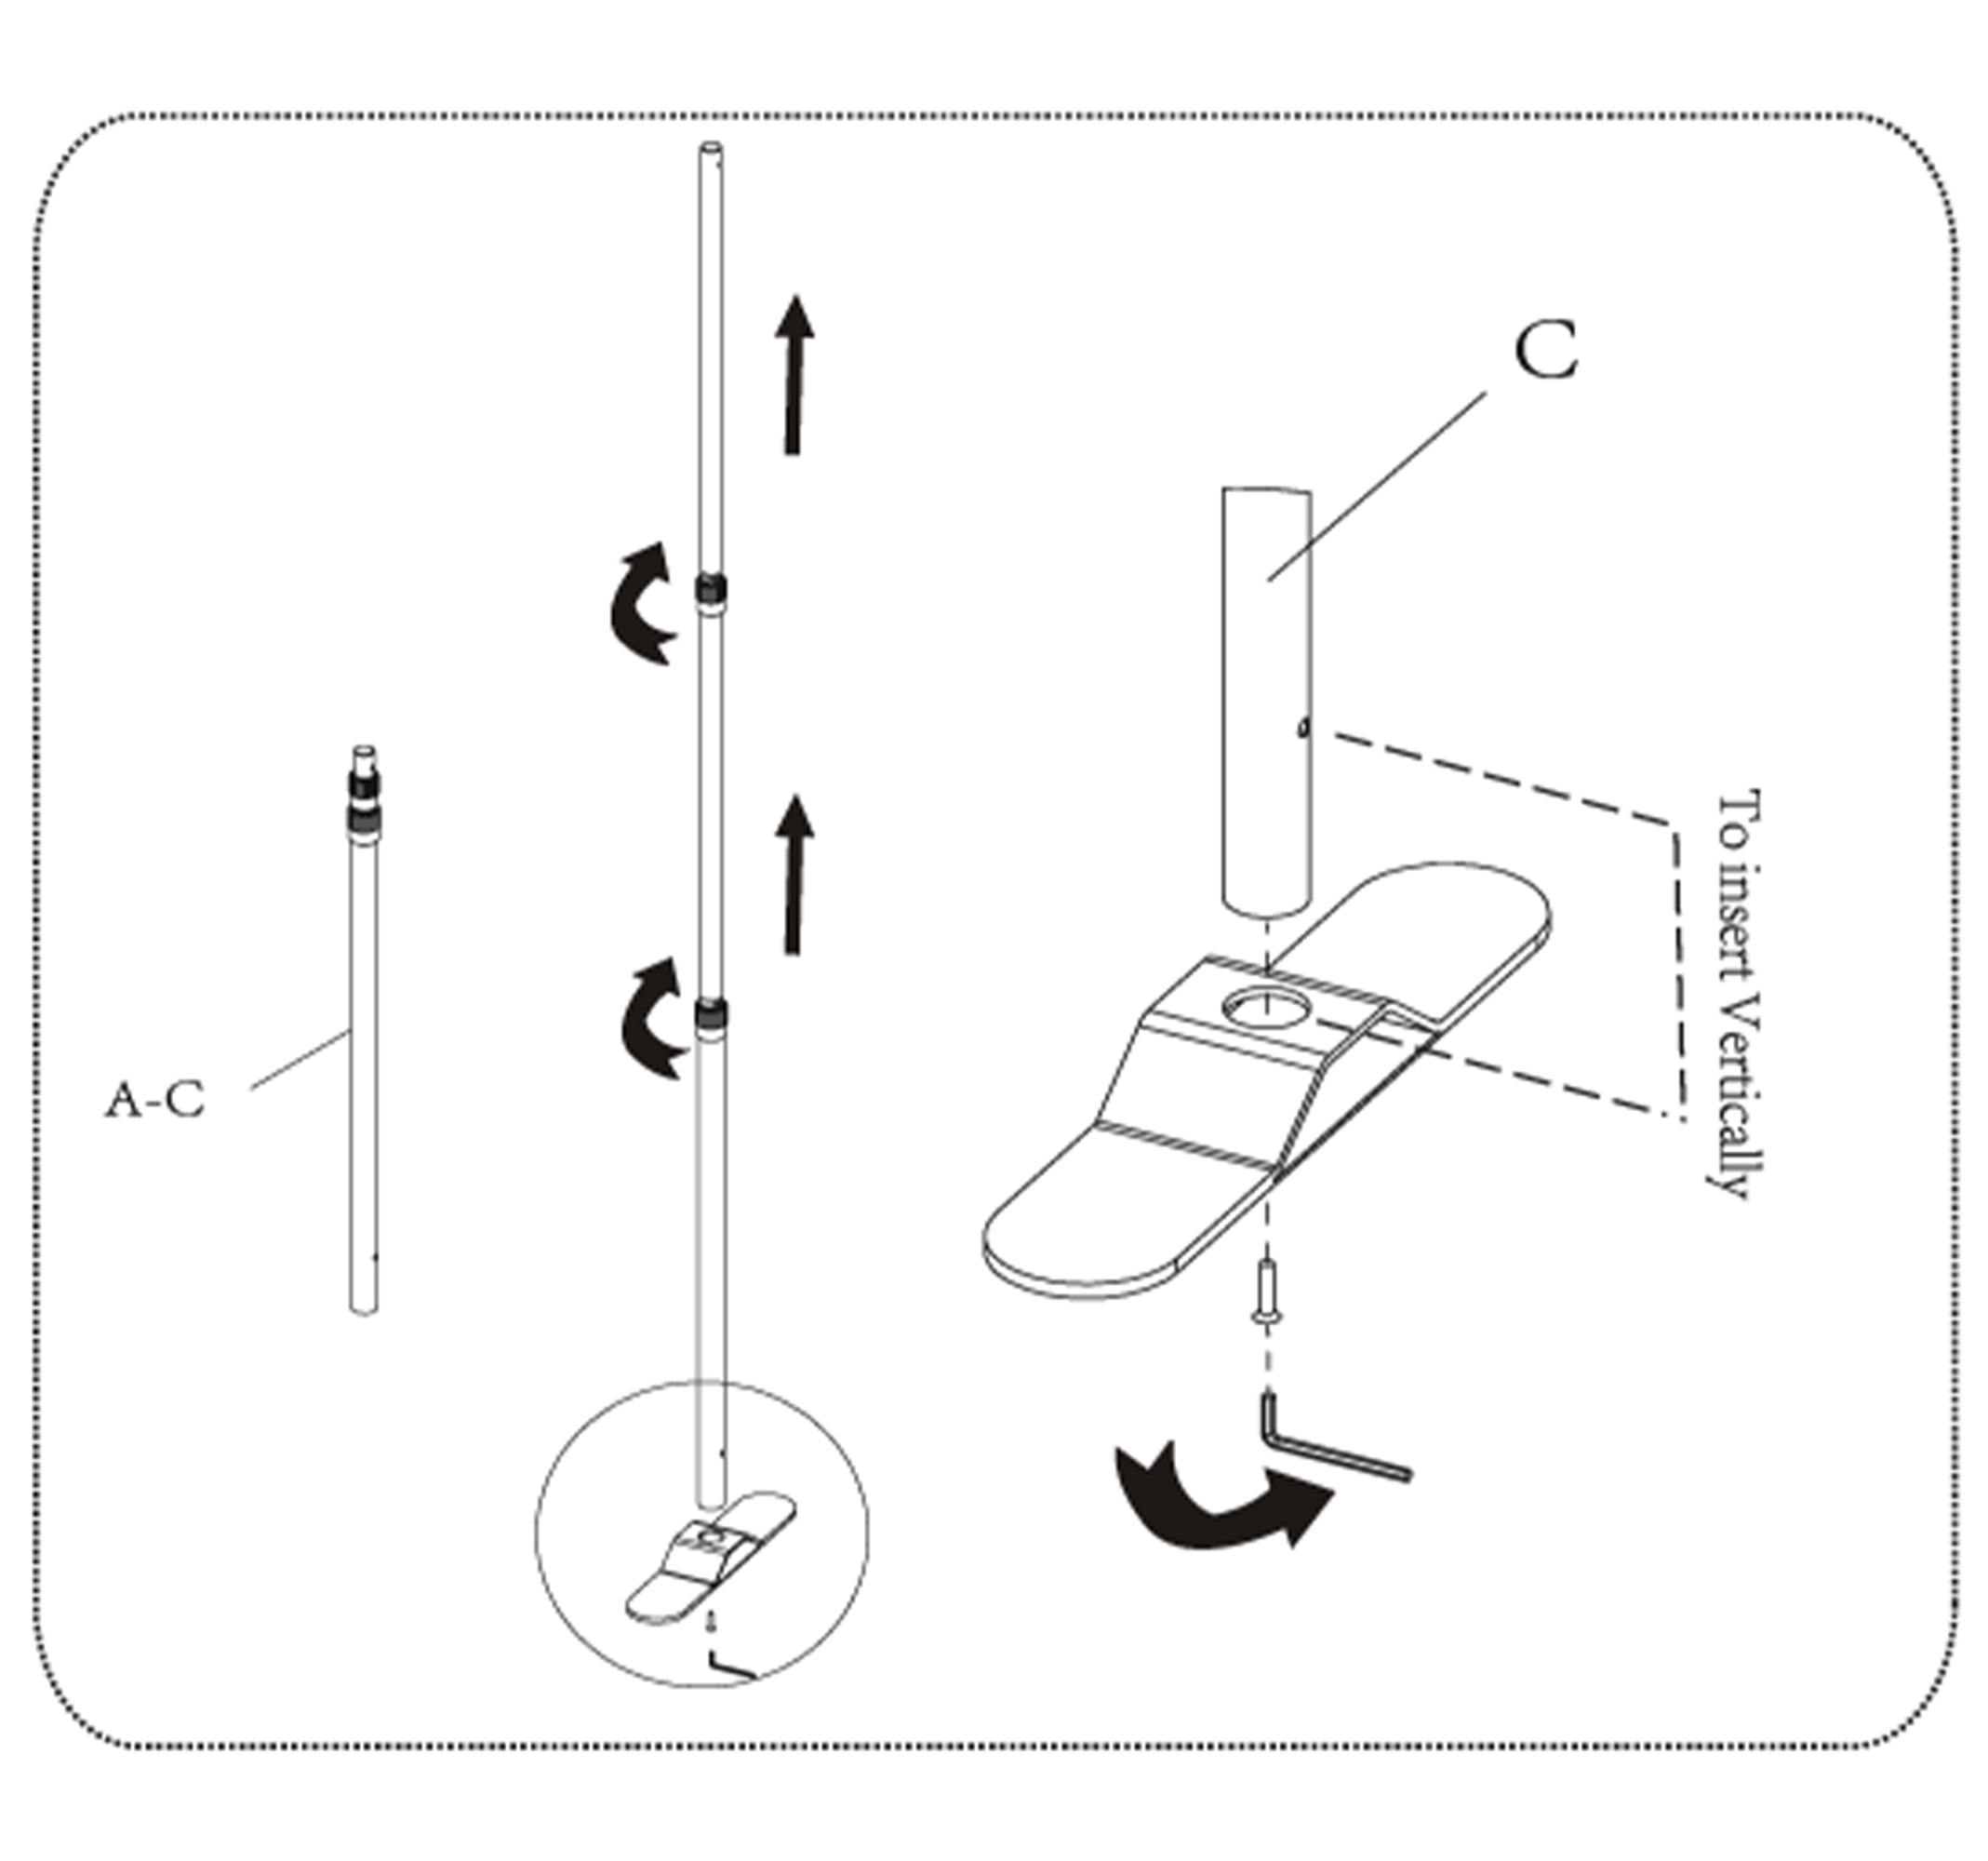
Step 2: Take vertical pole #A-C and insert end C into the pole socket in the base. From the bottom of the base thread hexbolt into end C and tighten.
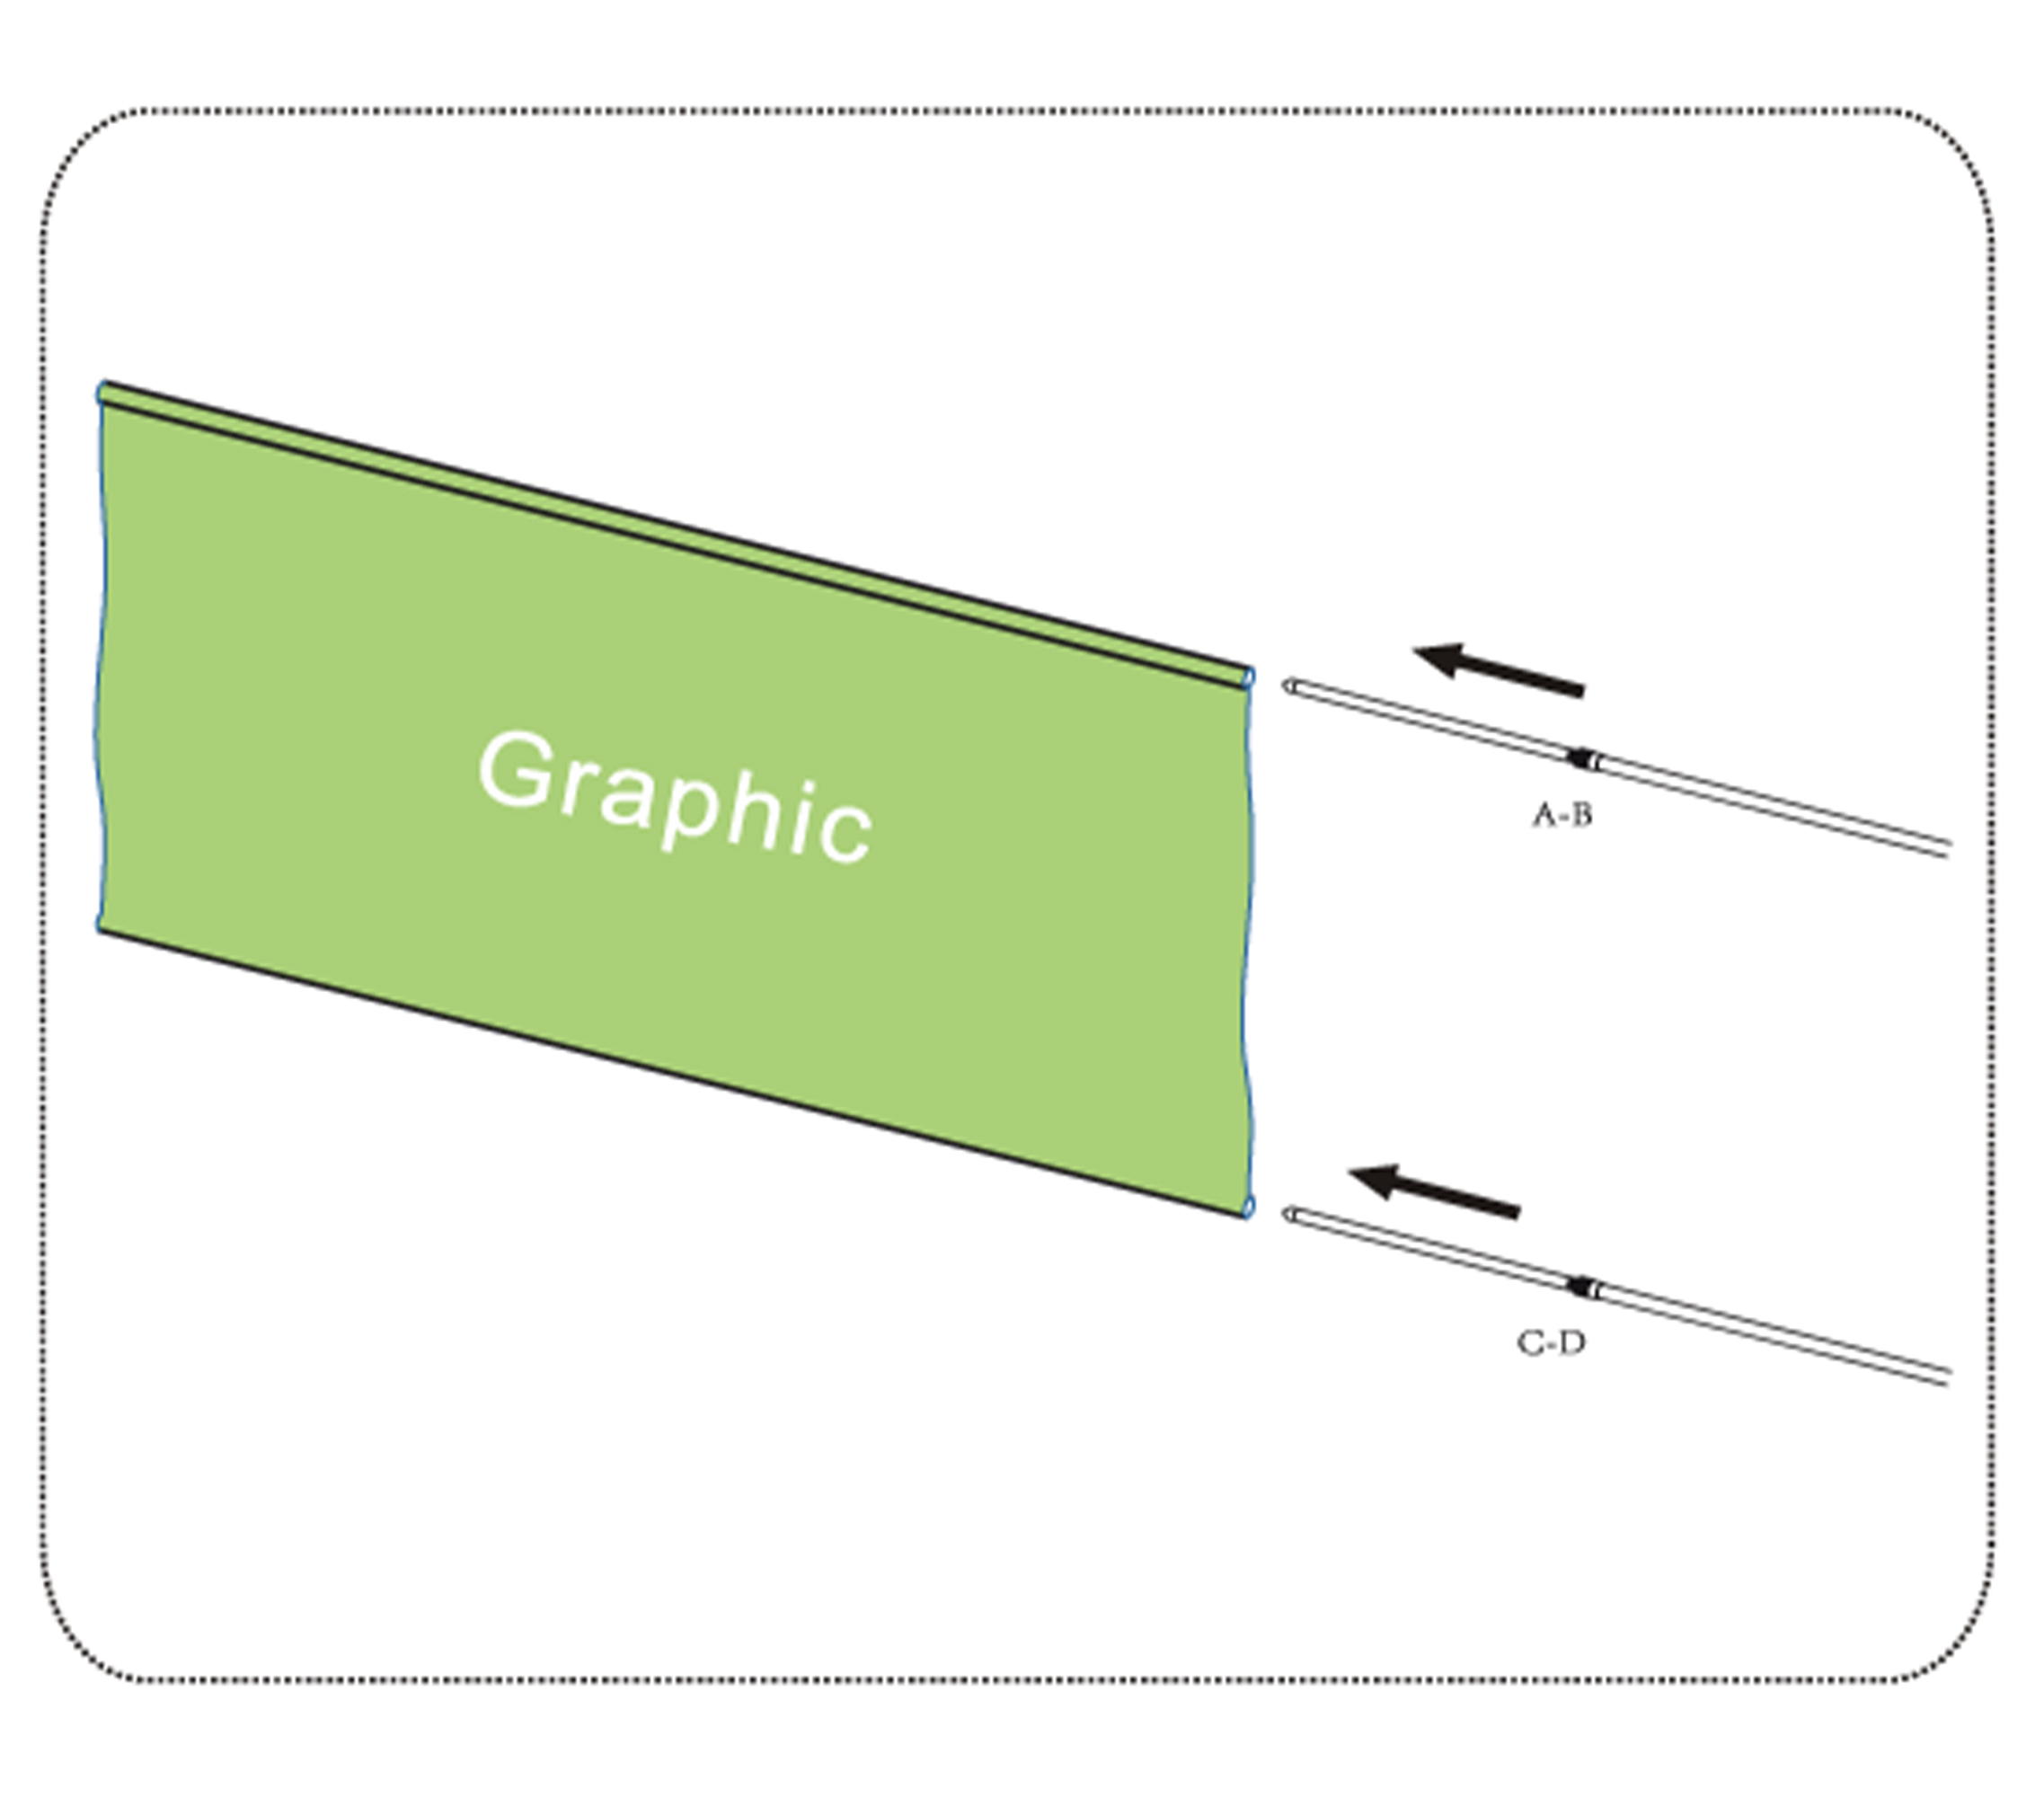
Step 3: Run poles #A-B and #C-D through the pole pockets on the top and bottom of the graphic.
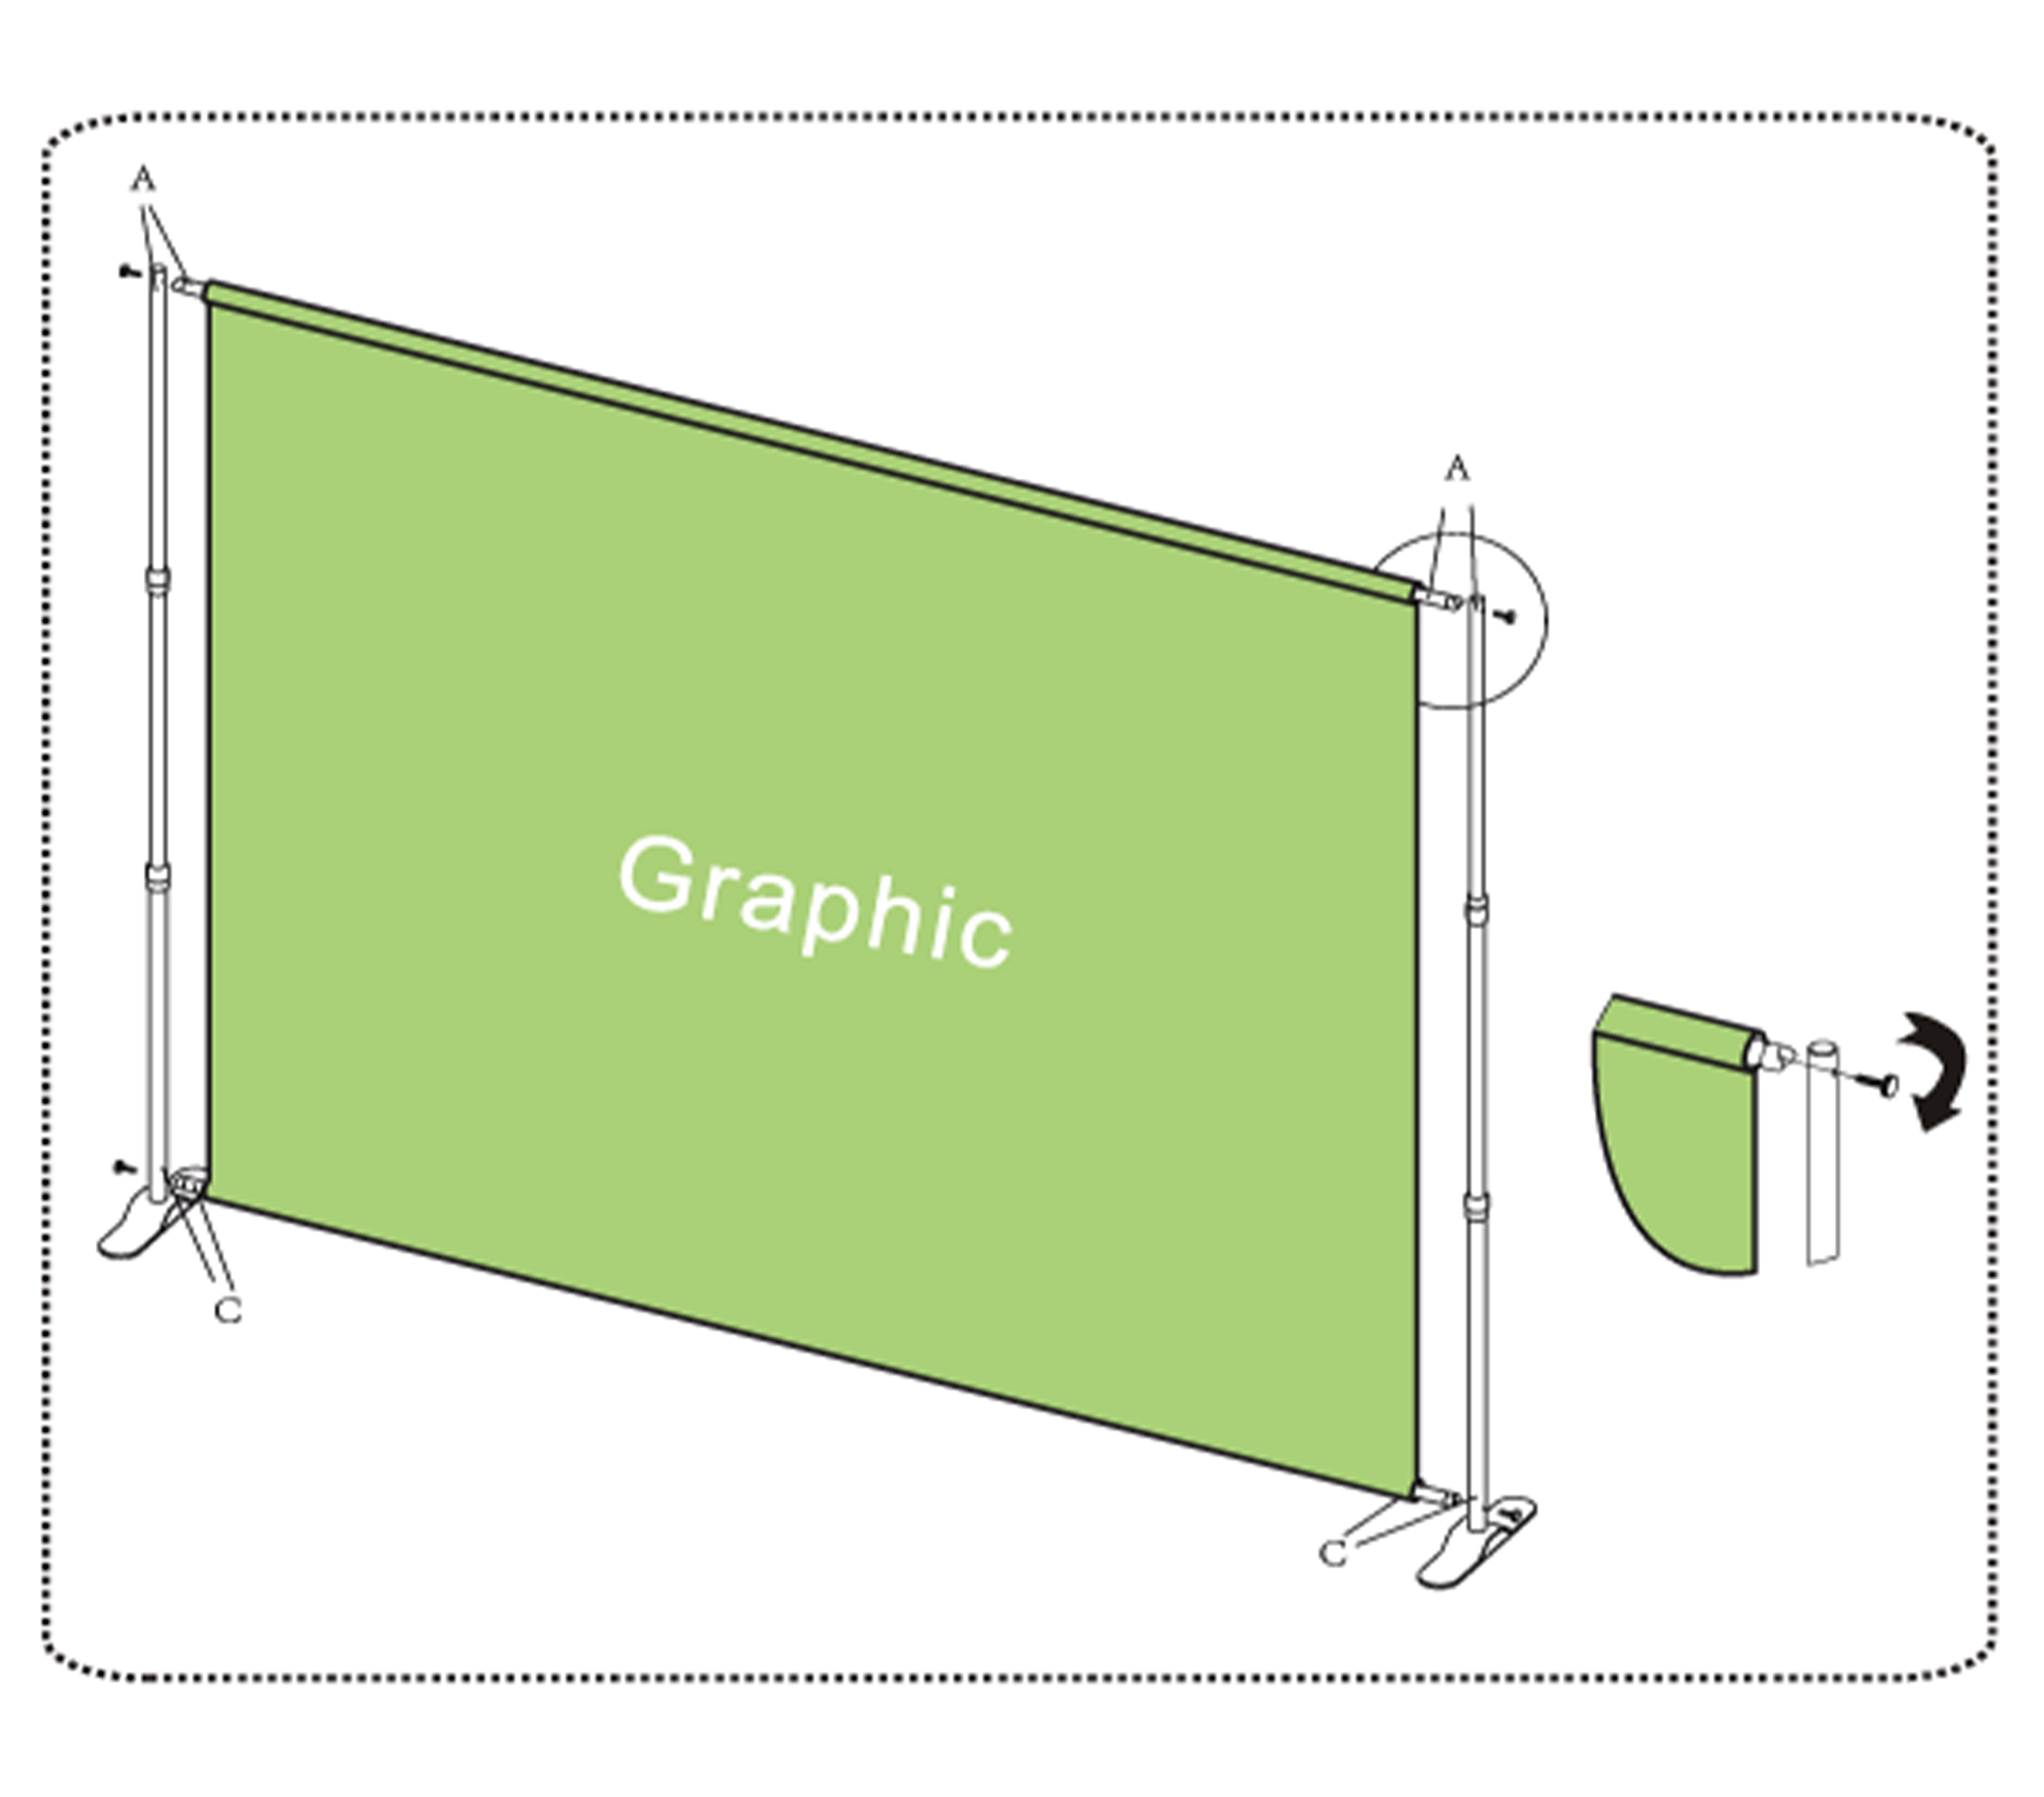
Step 4: Use the black handled thumb screws to secure the horizontal poles to the vertical poles.